Author Archives: admin

Yellow Eye Bean Salad with Sorghum

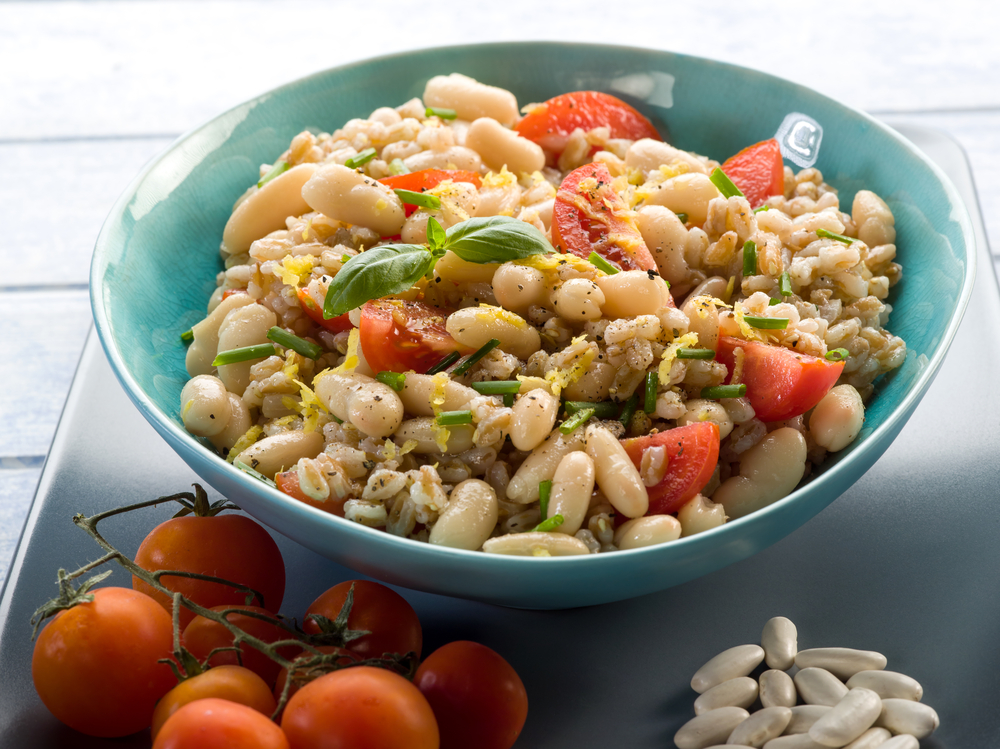
Beans are a great source of protein. I enjoy experimenting with different beans to bring variety into my diet. Yellow Eye Beans are high in dietary fiber and iron, low in sodium, and contain no sugar, saturated fat, or cholesterol. One cup of Yellow Eye Beans (boiled) is approximately 250 calories. This recipe can be made with another bean if you cannot find Yellow Eye Beans.

I hope you enjoy this light yet satisfying bean salad. The flavors and textures make each bite enjoyable. Serve with Gluten Free crackers or rolls if you wish to add carbohydrates to the meal. Traditionally Yellow Eye Beans are cooked with honey or molasses and are made into a baked bean side dish. I love this recipe as it allows the flavor of the bean to shine, rather than overpower it with sugar. If your local store does not have dry yellow eye beans, you can find them for sale on Amazon.

Enjoy this YogaLean recipe and find others at HealthyRecipeVariations.

Screen Shot 2015-09-30 at 10.52.21 PM

Base Ingredients:

2 cups of DRY Yellow Eye Beans

3 cups of water

3 cups of low sodium vegetable broth

1 bay leaf

4 cups of vegetables – cut in even sizes – I used a variety of bell peppers, onion, garlic, and sweet potato.

Olive oil for sautéing vegetables

1 cup of low sodium vegetable broth for preparing the vegetables
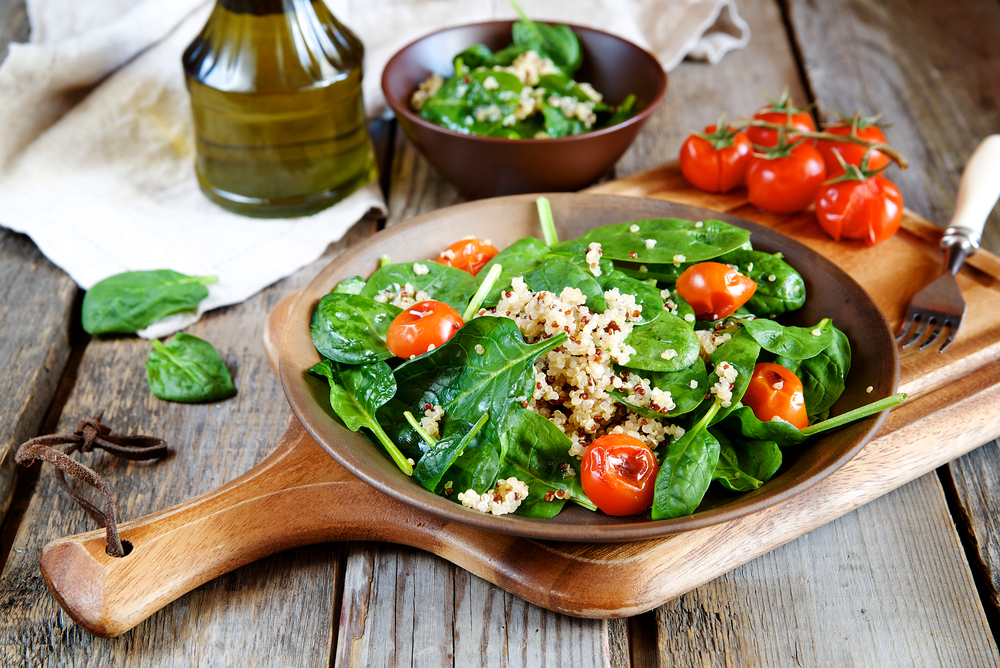
2 cups of spinach

1 cup Sorghum ( I use Bob’s Red Mill)

Screen Shot 2015-09-30 at 10.52.52 PM

Variations:

Substitute your favorite bean for the Yellow Eye Bean

Substitute red cabbage (diced) for the spinach

Substitute quinoa or millet for the sorghum

Vegetables: Staples include onion or shallot and garlic

Combinations can include:

mushroom, bell pepper, and basil

carrot, sweet potato, and tarragon

leek, sweet potato (or potato), and parsley


Instructions: After the beans are hydrated, it takes 30 minutes or less.

Rehydrate the beans (and bay leaf) in the liquid. I like to do this overnight.

After the beans have hydrated, slow cook them until they get soft…but still have an amount of firmness. The cooking stopping point is a moment to reflect on personal preference. If you want a little bite to your bean salad, stop cooking before the beans crack open and get soft. If you wish the soft texture to the bean salad, allow them to cook longer. Coking time is 1-2 hours.

Prepare the sorghum according to package directions (3 to 1 ratio). For the liquid, I use a combination of water and low sodium vegetable broth. This takes 30 minutes or so.

After the beans and sorghum are ready, dice the vegetables you wish to use.

Add the vegetables to a pan with 2 TBSP olive oil. Sautee and stir for 3 minutes then add 1 cup of low sodium vegetable broth. Allow the vegetables to soften some with the liquid.

When the liquid is almost absorbed by the vegetables, add the sorghum, and 3 cups of cooked beans. Stir.

Serve on a bed of spinach, stir spinach in the mixture and serve, or put the mixture in a “to go” container and take with you as a work-day lunch!

The dish is wonderful warm or cold. Garnish with sesame seeds or sunflower sees for added texture!

Screen Shot 2015-09-30 at 10.52.52 PM

Spinach Quinoa Salad

Quinoa is a complete protein that is very versatile. When paired with spinach, kale, or mixed greens it can become a satisfying main dish salad that provides protein, fiber, Omega 3’s, and anti-inflammatory nutrients.


Quinoa, like risotto, is a great way to use up small amounts of vegetables that you have left in the kitchen.  If you cook the quinoa ahead of time, you can sauté vegetables to create your desired flavor profile and add some cooked quinoa at the end of the cooking process.


In this dish I used okra, onion, garlic, zucchini, and sweet potato. Experiment with the flavor profiles that you prefer, perhaps trying a new vegetable in a small portion in a dish like this to see if you like it and wish to add it to your repertoire.


Enjoy this YogaLean recipe after a workout. Pair it with a Gluten Free roll or crackers. For a beverage, water with lemon or herbal tea (hot or cold) would be a nice pairing with this salad. Read other YogaLean Gluten Free recipes at Healthy Recipe Variations.

Base Recipe Serves 2:

I Cup COOKED QUINOA

3 Cups Evenly Diced Vegetables…the smaller the cuts the better  

4 TBSP Olive or Walnut Oil

1 Cup Vegetable Broth (low sodium)

4 Cups Baby Spinach


Garnish:

Basil, Rosemary, Tomatoes, Dried Fruit, Seeds or Nuts

Instructions:

Cook the quinoa according to package directions. I like to substitute low sodium vegetable broth for half of the water.

Evenly dice the vegetables and sauté them in chosen oil.

Add the broth and let the vegetables steam until the broth is almost absorbed. This leaves the vegetables el-dente if you cut them thin enough.

Add the cooked quinoa and stir to combine.

Rinse the spinach and pat dry. Divide evenly between two plates.

Top with the quinoa mixture in the center of the bed of spinach.

Serving Suggestions:

Garnish with seeds and nuts for added crunch if you wish.

Add dried fruit for a sweeter garnish.

Add tomatoes if you wish a touch of acidity.

Top with basil or rosemary, if you desire, for additional flavor.

You can top with oil and vinegar or allow the moist quinoa mixture to flavor the salad. 

Red Cabbage Salad with Vegetables and Basil

It is much easier to eat a Gluten Free and maintain a YogaLean lifestyle if you plan ahead. Salads can be a great meal or side dish but can be a detriment as well if you do not make good choices. They need not be laden with heavy dressings to be appreciated. Opt for seasonal vegetables, fruits, and lean proteins or nuts to be the star of the dish rather than a dressing.

Salads do not have to be constructed with a base of lettuce. Many other “greens” can be used as a base. According to studies, cabbage is a great vehicle to use as it provides the body with Calcium, Iron, and Potassium. It is a very good source of Dietary Fiber and Vitamin C.

I like to include a variety of colors, textures, flavors, and food groups to my salad to provide a satisfying meal or, if a smaller portion is served, accompaniment to a meal.

My inspiration for cabbage salads began with the idea of modifying coleslaw. I appreciated the intricate dice and the firm texture of the cabbage but did not particularly enjoy the dressing. At home I began experimenting with the diced cabbage with an oil and vinegar dressing and was hooked.

Cabbage comes in both green and red varieties. I look for a firm head of cabbage when I go shopping. Experiment with either red, green, or a multicolor cabbage salad next time you wish a salad as a meal or a side dish. Enjoy this Gluten Free YogaLean recipe as you look to make healthy food choices while keeping up an active lifestyle.  More Gluten Free recipes can be found on my blog at http://healthyrecipevariations.blogspot.com/.

Red Cabbage

Base Recipe for a Side Salad (double and add protein if being used as a meal):

1-1.5 Cups of Diced Cabbage

1 Cup of Diced Seasonal Vegetables

2-4 TBSP Oil and Vinegar Dressing

Optional Ingredients:

2 TBSP Fresh Basil (used here) or Rosemary

Crushed Red Pepper Flakes (1 TBSP or to taste)

2 TBSP each of any of the following: Sesame, Pumpkin, or Sunflower Seeds

Red Cabbage 1

If converting to a meal …. PROTEIN additions:

1 Cup of Nuts

1 Cup of Lean Meat (thinly sliced)

1 Cup of Tofu (I prefer pan fried)

1 Cup of Cheese

1 Hard Boiled Egg


Dressing Options (use 2-4 TBSP):

Oil and Balsamic Vinegar

Oil and Balsamic Vinegar + Pesto

Oil and Balsamic Vinegar + Sriracha

Oil and Balsamic Vinegar + Honey Mustard

Red Cabbage 2

Spinach Salad with Figs, Walnuts, and Brie

A salad can be an accompaniment to a meal or can be a meal itself. The portion size determines everything – salads are a great way to incorporate seasonal fruits and vegetables into your meal. If you are making your salad and entrée, make good choices to ensure you have a balanced meal and include protein and carbohydrates.


I find the keys to success with a salad include bold flavors, multiple textures, and a variety of food groups.


This salad can be a meal or a side dish. If using as a meal, you may wish to serve gluten-free crackers on the side or gluten free cornbread. If the figs are very ripe and juicy, you may not need salad dressing. If you do need dressing, I suggest a simple oil and vinegar so that the flavor of the fruit and brie stands out, not the dressing.

Figs are a great find when they are in season. They are low in calories while high in dietary fiber and antioxidants. Research shows the chlorogenic acid helps lower blood sugar levels and control glucose; an important factor for those with adult onset diabetes.


Base Ingredients:

Spinach

Fresh Figs

Brie

Walnuts (another soft nut like pecans can be used instead)

Screen Shot 2015-09-08 at 11.33.57 AM

Optional:

Oil and Vinegar Dressing

Add diced dates for flavor and texture


Enjoy this YogaLean recipe and other gluten-free recipes at Healthy Recipe Variations

Protein Packed Belgian Waffles and Seasonal Fruit

Some days we have more time for breakfast than others. On those rare occasions when I can sleep in and have a leisurely breakfast before starting my day, I enjoy making Belgian Waffles. This is a treat as each waffle takes a few minutes to cook, each flavor is a delight and wants to be savored, slowly, and it is a filling meal.


Belgian waffles are weekend and holiday treats. I usually follow them by a workout. I cannot think of a better way to spend the day…unless it was to share the meal and workout with all my family and friends!


Enjoy this Gluten Free YogaLean Meal and find other Gluten Free recipes at http://healthyrecipevariations.blogspot.com/.


Base Ingredients:

NOTE: This recipe reflects a modification of “Easy Waffles” from the Pamela’s Products Website.


1 cup Pamela’s Baking & Pancake Mix

1 cup Flaxseed Meal (I use Bob’s Red Mill)

2 Eggs

3 /4 Cup water or milk of your choice…I tend to use Almond Milk here

1 scoop Vanilla Protein Powder (Gluten Free) or 1 TBSP Vanilla flavoring, Almond Flavoring, or Maple Flavoring.

Waffles 1

Optional Batter Stir-Ins:

Berries, Dried Fruit, Chopped Nuts, or Chocolate Chips

Optional Toppings:

Fresh Fruits

Fresh Fruits and Nuts

Honey (instead of syrup)

Peanut Butter + Jelly or Fruit or Dark Chocolate Chips

Coconut Butter + Fruit (Fresh or Dried)

Waffles 2

Instructions:

-Combine ingredients in a mixer and stir until all lumps are removed.

-Pre-Heat waffle maker

-Add batter to waffle maker…start in the center so it does not ooze out the edges!

-Cook until the indicator on your waffle maker says it is done

-Add toppings and serve

NOTE: Leftover waffles can be stored in an airtight container. They reheat best in a toaster oven or oven. Leftover batter can be stored in an airtight container for about 5 days.

Waffles 3

Amaranth Fruit and Nut Cereal

Amaranth is a complete protein. It is a YogaLean way to start your day. You can customize the flavor profile so that you can make this dish day after day and it does not have to be the same. The nutritious grain comes from a fast growing plant related to beets, chard, spinach, and quinoa.

Texture is important to many people. This cereal can be made dry or have a liquid/runny content depending on the amount of liquid used. The consistency this recipe produces can be related to tapioca or cream of wheat.

Enjoy this Gluten Free Breakfast and find other Gluten Free recipes at Healthy Recipe Variations.  

Screen Shot 2015-08-24 at 2.58.25 PM Screen Shot 2015-08-24 at 2.58.38 PM Screen Shot 2015-08-24 at 2.58.51 PM

Base Ingredients (Serves 2)
1 Cup Amaranth (I use Bob’s Red Mill)
2 Cups Water (or milk of your choice)

1/ 2 Cup Almond Milk
1 TBSP Flavoring (I suggest Vanilla, Almond, Maple, or Cinnamon)

NOTE: I started with some pre-cooked Amaranth. The recipe calls for 3 cups of water to 1 cup of Amaranth. I used 3 cups of water to partially cook 2 cups of Amaranth. This technique allows me to use the amaranth in a variety of recipes throughout the week, and cuts down on preparation time when I wish to make the additional meals.  I used 2 cups of partially hydrated amaranth and added 1 cup of almond milk to a pot. I added 1 TBSP ALMOND flavoring and cooked until the almond milk was almost absorbed.  Then I added 1 cup of fresh dates stirring until all liquid is absorbed.


It was suggested I try Almond Flavoring when cooking with figs…I fell in love when I took that suggestion!


Fruit and Nut Options: (Seasonal Fruits are More Flavorful)

Figs, Bananas, Almond Flavoring, and Walnuts

Berries and Vanilla

Dates and Cinnamon

Dried fruits and nuts w/ flavoring of your choice

Stone fruit, vanilla, and pecans

Mango, coconut, and coconut flavoring

Pumpkin, pumpkin pie spice, and walnuts or pecans


Instructions:

Combine the ingredients (minus the fruit and nuts) in a pot.

Bring to a boil then reduce heat to a simmer. Stir from time to time.

When liquid is almost absorbed, add the fruit and nut combination of your choice and stir until the liquid is absorbed.


Cooking time: 30 minutes if amaranth is dry, 15 minutes if partially cooked.

Gluten Free Breakfast Crepes

Once I find something I like, I have a tendency to eat the same thing day after day. Therefore, I make a concerted effort to discover new recipes and modify them to diversify my meals! The Gluten Free Breakfast Crepe is a modification of a recipe I found on the website for Pamela’s Baking and Pancake Mix. This YogaLean meal is a great way to start your day! The beauty of the crepe is that you can fill it with a variety of ingredients. Each crepe you make for yourself can be different and each crepe made for a family can be filled with ingredients that fit personal tastes. If you are using this before a workout, add additional protein. Enjoy this Gluten Free Breakfast and find other gluten free recipes at Healthy Recipe Variations.

Screen Shot 2015-08-17 at 2.32.09 PM

Ingredients:

1 Cup Pamela’s Baking & Pancake mix

3/4 Cup of milk of your choice (I used almond milk)

1/4 Cup of water

1 Large egg

1 TBSP oil (I used coconut oil)

1 TBSP vanilla flavoring (I used vanilla flavored gluten free protein powder. You can use vanilla extract or substitute almond extract)

1/2 cup of ground flaxseed meal (I used Bob’s Red Mill)

Additional oil for the pan (I used walnut)

Screen Shot 2015-08-17 at 2.32.21 PM

Screen Shot 2015-08-17 at 2.32.30 PM

Instructions: (Makes 4-6 crepes)

Combine ingredients and remove as many “lumps” as possible

Heat the pan with a small amount of oil

Scoop 1/4 Cup of the batter and add to the hot pan. Turn the pan in a circle trying to get batter to form a thin layer on the bottom of the pan.

Use a spatula to start to lift the edges and make your way, carefully to the center. (Add additional oil of batter sticks…start conservative…add more as needed)

Carefully flip crepe. Cook 1-2 minutes on the second side.

Serve or cover with a cloth or parchment and make additional crepes.


Screen Shot 2015-08-17 at 2.32.38 PM

Screen Shot 2015-08-17 at 2.32.45 PM

Filling Suggestions:

Peanut Butter (ANY Nut or Seed Butter) and Chia Jam

Scrambled Eggs…garnish with fruit

Brie and Figs…garnish with walnuts and honey

Butter the crepe and sprinkle with powdered sugar (child’s favorite)

Fresh Fruit…garnish with Chia Jam

Cream Cheese…garnish with fresh fruit

Applesauce…sprinkle with cinnamon to garnish

Banana and Nutella…garnish with banana

Banana and Nut or Seed Butter…garnish with banana

Teff Morning Hot Cereal

A high protein and high fiber breakfast is a great way to start the day as the meal fuels you for early morning exercise or diminished cravings to snack before lunch.


Oatmeal has been a staple in my diet for a long time. Once I needed to eat a Gluten Free diet I started to explore other grains to add variety to my diet (MANY Gluten Free recipes call for oats or oat flour). Teff is a great grain to use in place of morning oatmeal! Like oatmeal for breakfast, Teff Morning Hot Cereal lends itself to many options; it can be customized to fit your preferences and your cravings! Enjoy this YogaLean Gluten Free Breakfast and read more recipes at Healthy Recipe Variations.


This recipe needs monitoring for the first few minutes as the teff is being toasted. After that, it just needs an occasional stir. You can multitask or relax while it is cooking! The picture you see is the addition of seasonal fruit (blueberries), bananas, walnuts, and a teaspoon of Nutella.


If you do not use all of your teff hot cereal, store in an airtight container. Reheat by placing in a bowl with a wet paper towel on top and microwave for 1 minute. Stir and check heat. Heat an additional minute if needed. Serve with toppings of your choice so each meal is different! Have fun playing with your food … your healthy food!


Base Recipe (Serves 2)

1/ 2 Cup Teff (I use Bob’s Red Mill)

2 Cups Water (or milk of your choice)

A Pinch of Salt

1 TBSP Flavoring (I suggest Vanilla, Almond, Maple, or Cinnamon)

OPTIONS: Add seasonal fruit or dried fruit or nuts when serving)

Instructions:

1. Add the Teff to a pot and bring to medium heat. Toast teff, stirring from time to time, for 2 or 3 minutes. This will bring out the nutty flavor of the teff.

2. Add the pinch of salt and liquid to the pot and cook until liquid is absorbed. Stir occasionally.

3. Serve as is or add stir-ins.

Screen Shot 2015-08-15 at 1.02.54 PM

Stir-in Options:

Milk of your choice

A spoonful of Greek Yogurt on top

Seasonal berries

Dried fruit (Dates, Figs, Apples work well)

1 TBSP Honey, Agave, Nutella, or Nut Butter

A handful of nuts (Walnuts, Pecans, or Cashews, or Slivered Almonds work well)

Gluten Free Mini Quiche

August 6, 2015 | Rene MacVay, Healthy Recipe Variations

I love starting my day with a nutritious breakfast. Some days, I have more time than others to sit down and have a meal. Varying what I eat is important so that I get a variety of nutrients through my diet. If you are like me, you could eat the same thing day after day because you like it… and a routine is an easy rut one can fall into if you are not careful.


Try experimenting with different breakfast ideas. Breakfast is an important meal as it starts your day. Start the day out right with this YogaLean Gluten Free Mini Quiche. You can customize it to add the vegetables that you have on hand, the ones that YOU LIKE. Have fun playing with your food and getting a healthy start to your day.


I have experimented with a gluten free quiche before and have loved the results! This recipe is a modification of my original using muffin “skirts” to make individual quiches and reduce the cooking time. The quiches in this way can be eaten as a grab-an-go breakfast or enjoyed in the home before heading out to start the day. Pair the quiche with seasonal fruit and enjoy!  Read more recipes at Healthy Recipe Variations.

Mini Quiche (makes 12)

6 Eggs

1 1/2 Cups Milk (I used original Almond Milk)

2 Cups of Diced Vegetables (I used Red Bell Pepper, Red Onion, and Spinach)

1/2 – 3/4 Cup of Shredded Cheese (Cheddar, Parmesan, Mozzarella work well)

3/4 Cup diced Canadian Bacon

Salt and Pepper to taste

12 Muffin “skirts”

Options:

Use spray olive oil to line muffin skirts so quiche does not stick…it happens in places when this step is not taken

Vegetable pairings suggestions are listed below but eating seasonally is ALWAYS suggested:

Broccoli, Asparagus, Red Onion, and Cheddar

Mixed Colors of Bell Peppers

Spinach and Red Onion or Scallion or Leek

Sweet Potato and Scallion

Omit Canadian Bacon…or substitute in Diced (Cooked) Bacon

Add a teaspoon of gluten free Ian’s Panko Bread Crumbs to the bottom of the muffin “skirt”

Instructions:

Preheat Oven to 375

Cook about 30 minutes until a knife inserted in center comes out clean. Check to see if done after 20 minutes and then each 5 minutes thereafter. Cooking time varies by oven as well as based upon how full the muffin is and how dense the ingredients are packed. Try to make each muffin uniform.

Start by dicing the vegetables you wish to use into SMALL pieces.

Combine eggs, milk, and salt and pepper (to taste) in a bowl. Whisk.

Add vegetables, cheese, and meat if you are using. Stir together with a fork.

Add muffin skirts to a muffin tin and spray skirts with oil.

Add quiche ingredients to skirts (evenly) and back!

Screen Shot 2015-08-05 at 9.58.26 PM Serving:

You can serve after the Mini Quiches have rested for about 10 minutes or store in an airtight container.

Pair with seasonal fruit … or with a salad if you with to eat this for lunch or dinner.

Kathryn Herbert on Ancient Healing in the Modern World

July 27, 2015 | Emelyn Daly, YogaFit Media

Ayurveda, ‘Life Science,’ and Common Sense

Expert Ayurvedic Practitioner and founder of Ayuway of Life Kathryn Herbert has me totally convinced of the value, efficacy, and do-it-yourself easiness of the ancient Holistic healing modality she teaches and practices. Herbert, who is thrilled to share her expertise at YogaFit’s first Ayurvedic Lifestyle Coaching Retreat in Austin, TX this September, has dedicated her life to using and educating others on Ayurveda. Here, she gives us an exclusive introduction to her upcoming workshops, which focus on making Ayurveda fun, user-friendly, and 100% applicable in daily life.

What is Ayurveda? What are some of the most common misconceptions about it?

“The first thing I like to tell people about Ayurveda is that in order to use it in your daily life, you don’t shutterstock_223478743have to know how to spell or pronounce it correctly! The word may sound a little unusual, but it’s much simpler than you think. In Sanskrit, ayu means ‘life’ and veda means ‘knowledge’ or ‘science.’ ‘Life science’ isn’t just ancient Sanskrit; it’s for everybody living in modern times. To me, it is the perfect owner’s manual package of common sense for the human mind, body and spirit.”

Ayurveda comes from India, correct? How does it relate to other forms of medicine?

“So, yes, the ancient health and wellness knowledge we know as Ayurveda does come from the Indus Valley. And from there, it actually traveled East and West, influencing both Chinese and Western medicine. Hippocrates was an Ayurvedic practitioner! The father of Western medicine himself said, “let food be thy medicine, and medicine be thy food.” That is Ayurveda.”

Do you think that Ayurvedic medicine could replace Western medicine?

“No, I would never recommend that Ayurveda can or should replace Western, aka ‘Modern’ medicine, yet it certainly does complement any and every form of medicine including surgery and as a preventative, it is designed to keep you out of the doctor’s office.

__
You know, in the West, we have a way of putting everything on a hierarchy. This or that has to be better or worse than something else. The East integrates healing approaches as opposed to creating that separation, which is the absolute definition of Holistic, it treats the whole person. In India, for example, an Ayurvedic doctor is a medical doctor, and there is a modern Ayurvedic hospital right next door to the modern Allopathic hospital, patients are sent back and forth by doctors from both sides. Both forms are equally valuable and used to compliment each other. I experienced this daily during my internship there.”

Which piece of your workshop in Austin are you most looking forward to?

“So many! I love my work because I get to translate this powerful knowledge into modern language and practical uses. In Austin, I’ll get to share my academic knowledge of Ayurveda, which works amazingly well with the YogaFit system. We’ll look at a couple Sanskrit words to demystify these new, hard-to-pronounce terms into common sense simplicity.

__
And there’s the practical end of things, which is really exciting! I’ll be showing people how to use this stuff in their daily lives. We’ll spend time on really concrete techniques that will be easily remembered to take home and use. We’ll spend plenty of time on food, and turn the tabletop into a classroom using food as medicine to learn why your kitchen is actually a pharmacy to be in service of yourself, those you love, and those you coach. Plus there are really fun Ayurvedic treatment practicums including the ‘meda buster’ massage to reduce fat on the body—one of my favorites!”

For more information about Kathryn Herbert and her workshops at the YogaFit Ayurvedic Lifestyle Coaching Retreat in Austin, TX coming up this September, visit YogaFit.com!

__
Kathryn Herbert practices privately in Southern California at the Ayurway of Life facilities and conducts national workshops to promote the benefits of Ayurvedic lifestyle choices. She lives in Los Angeles with her two teenaged children, two dogs, a cat, and three horses. She hopes to welcome chickens to her home soon!